


This resource can be accessed directly through Schwab.
This resource can be accessed directly through Schwab.
This resource can be accessed directly through Schwab.

Throughout the Portal, you will see this icon to add an account, this is if you would like to aggregate outside accounts such as bank accounts:
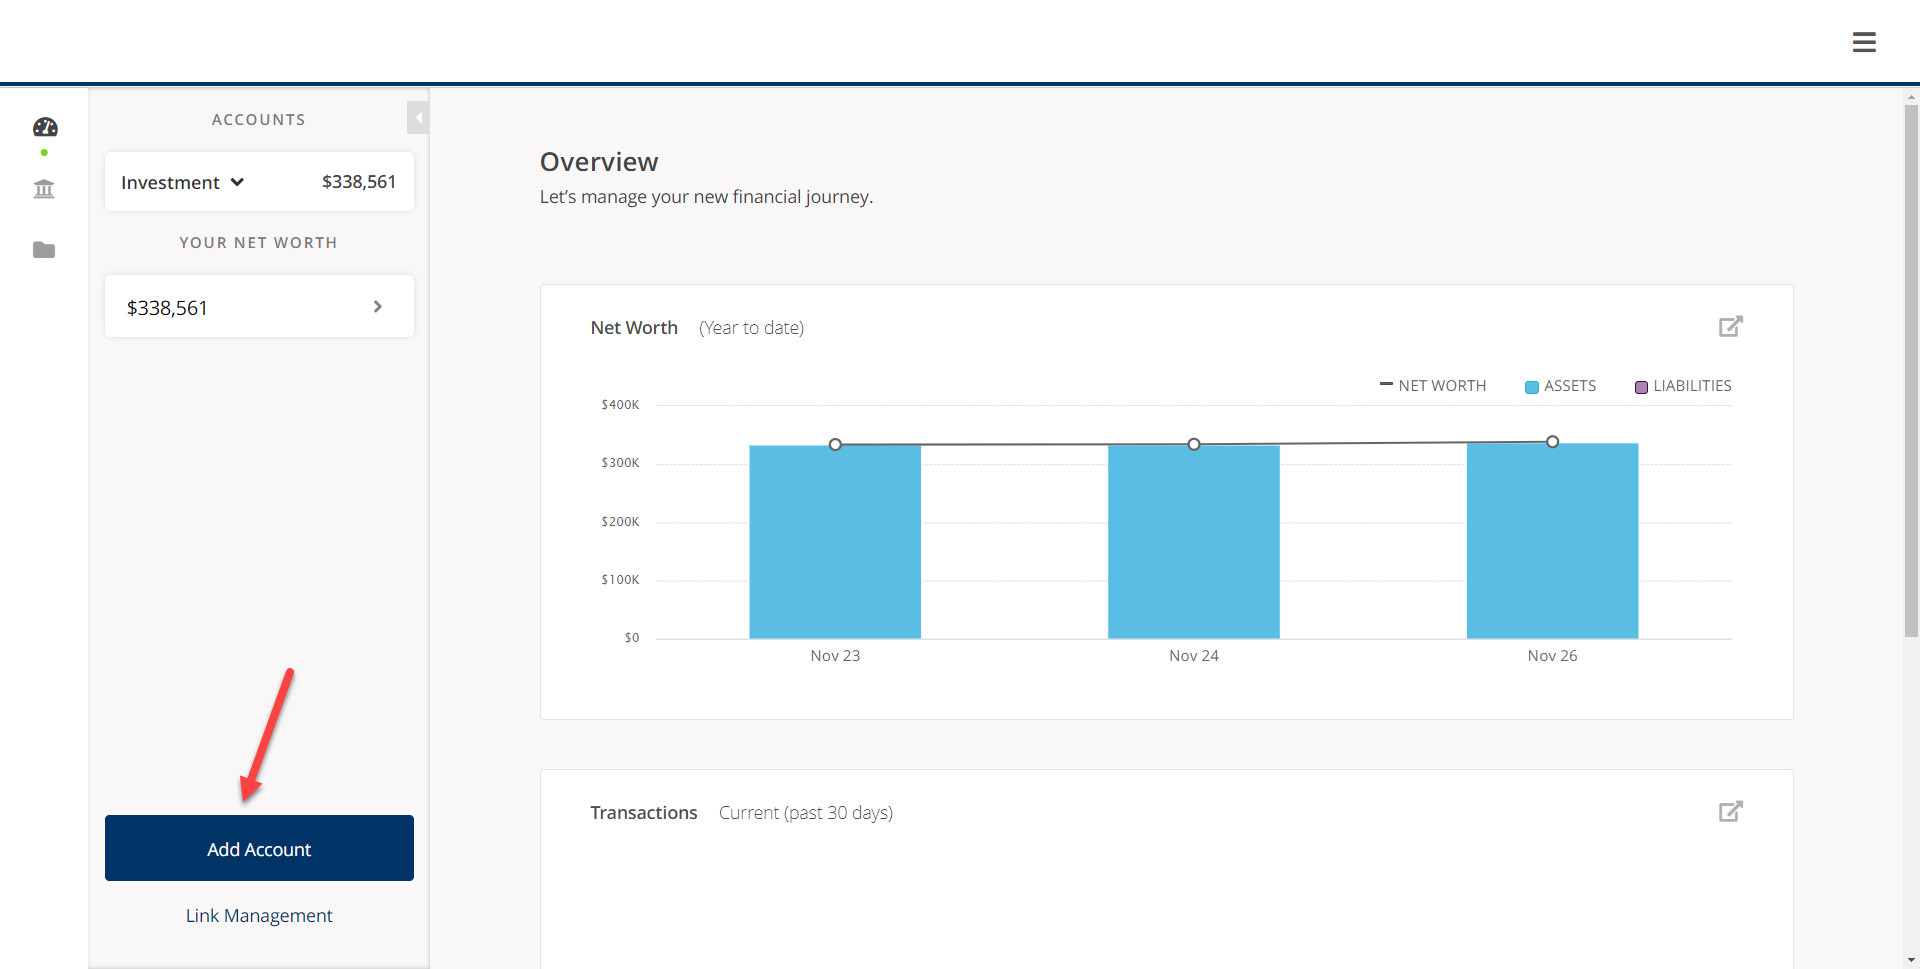
Click the Blue Box and you will be presented with this screen:

Start typing the name of your institution and when it populates, select it – for this example, we will use Chase Bank:

On the next screen, you will be asked to add your User ID and Password for that institution:

Once you click “login” you will see a screen that says “linking”

After the institution has been contacted, you will be prompted to enter in a temporary pin that will be sent to your choice of verification methods (email or text), choose the verification method that you would like and click “next question”

The Pin will be delivered, and you will enter it on the next screen:
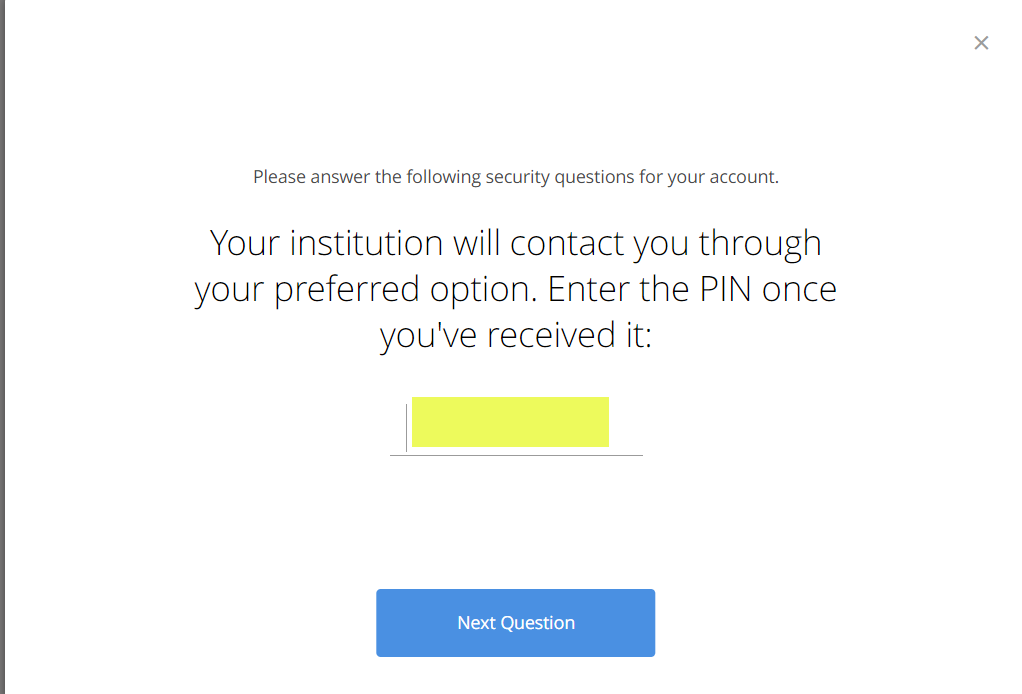
Click “next question” and you will see the linking screen again:

After the linking is successful, you will see this screen, click “Next”

After you click Next, you will see your new account on the accounts section of both the Overview and Personal Finances Tab

*Please note that the screenshots shown of the Client Portal are from a sample account created for demonstration purposes only. This sample account is being used for illustrative purposes only and does not represent actual client experiences or outcomes.


When your report is delivered, you will get an email from Adhesion Platform. The email will read as follows:
Subject: Trek Financial Group Quarterly Statement Available
Dear Client: A new report entitled “Trek Quarterly Report” has been prepared for you and is available for viewing. Please log into your portal by clicking the link below to view your report.
Once you have logged into your Client Portal, navigate to the folder icon on the left to see a list of the PDFs available to retrieve.

*Please note that the screenshots shown of the Client Portal are from a sample account created for demonstration purposes only. This sample account is being used for illustrative purposes only and does not represent actual client experiences or outcomes.


Click one of the underlying accounts to view an Overview.

In this view, you can choose an account by clicking the dropdown arrow at the top near the account name, or you can choose not to select an account and you’ll get the household view. You can also change the date options by clicking the blue date option dropdown on the right side. You can also get to the Personal Finances view by clicking the second icon down on the left side:

To keep the portal in a household view, do not select an individual account, instead, leave this section on “Managed Accounts”:

In this view, you will see more detailed performance activity including contributions and withdrawals along with performance by category (Equity, Fixed Income, Money Market).
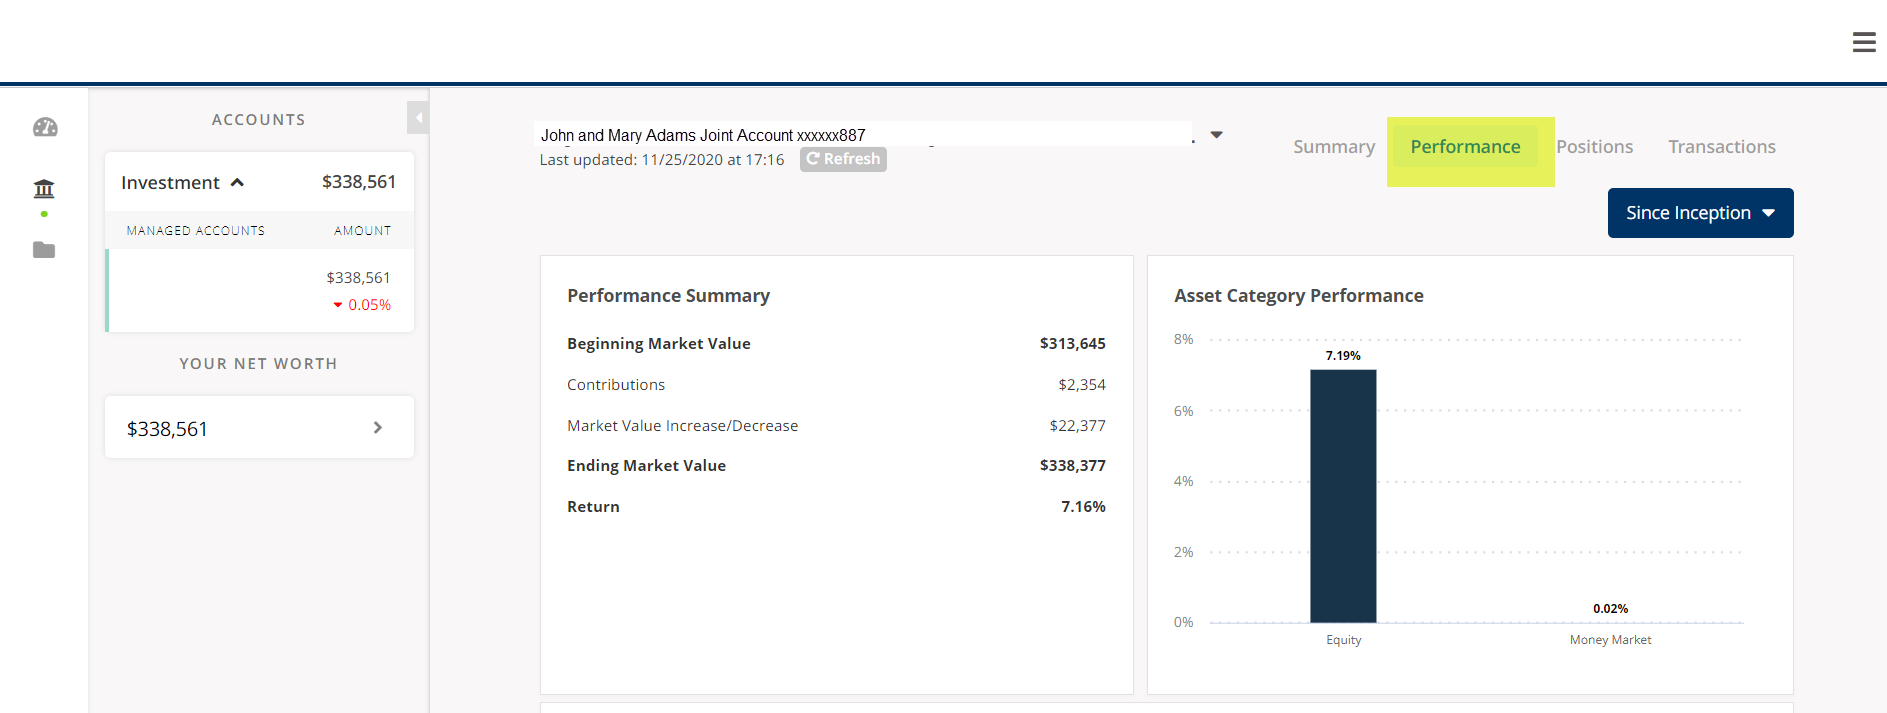
This will show you your asset allocation in graph form as well all of your individual holdings. The individual holdings section will display the market value, cost basis, unrealized and realized losses and the percentage of your account that holds each position.

In this view, you can see the transactions within the account you are viewing such as the buys, sells, withdrawals, deposits and dividends. You can also change the date range by clicking on the blue button in the upper right.

*Please note that the screenshots shown of the Client Portal are from a sample account created for demonstration purposes only. This sample account is being used for illustrative purposes only and does not represent actual client experiences or outcomes.



Overview
(Main dashboard, household aggregate)

Personal Finances
(Performance by account, Performance by Household, Asset Allocations, Positions, Transactions)

Vault
(Quarterly Report Delivery)
Once you are logged in, this is the first screen that you will see, this is an Overview of your managed accounts with Trek. This is a household view of all the accounts in your household. The overview page can also be found by clicking the first icon in the upper left.
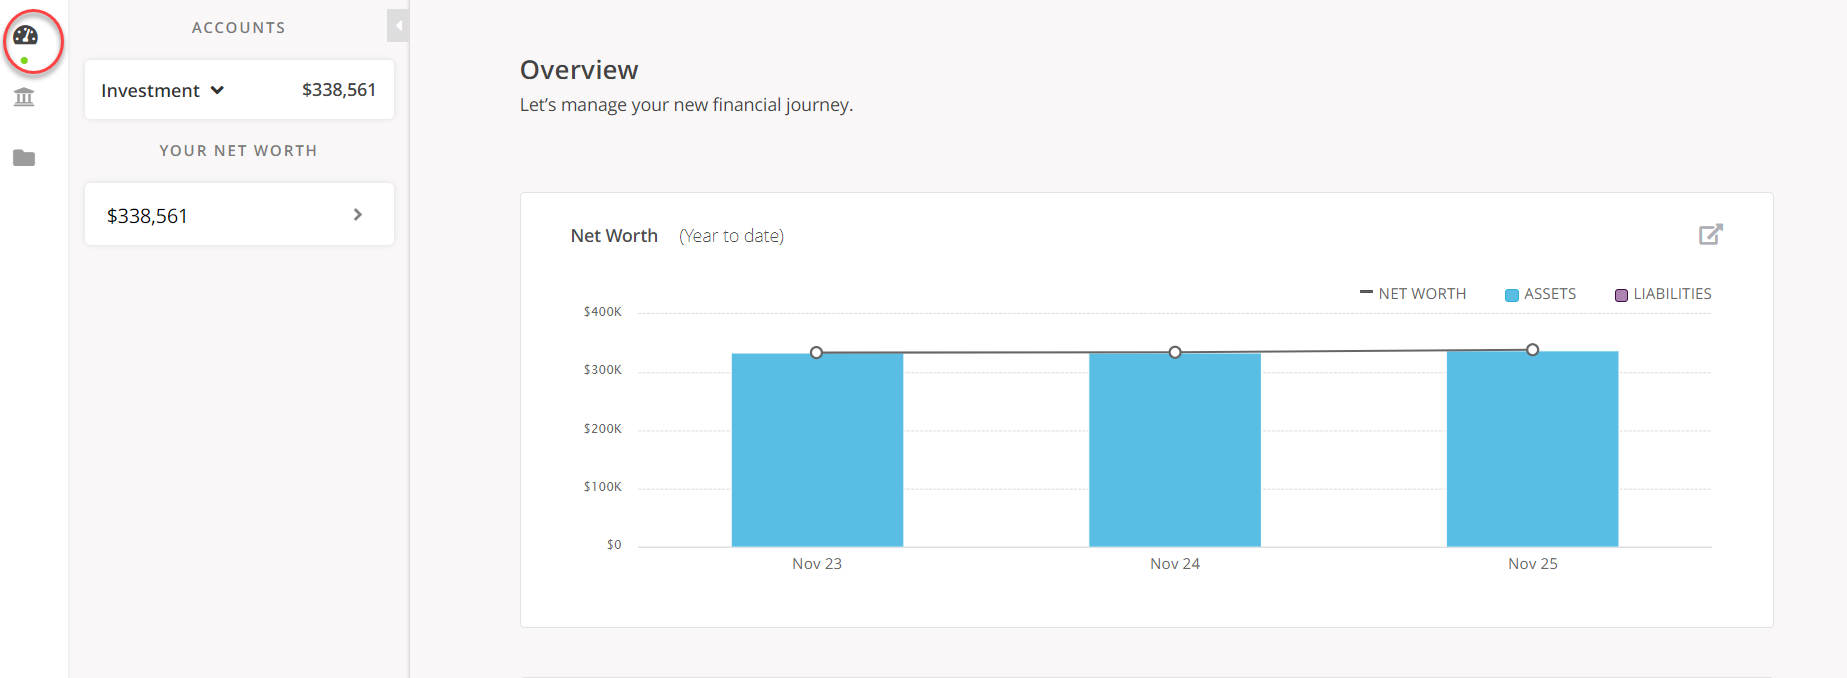
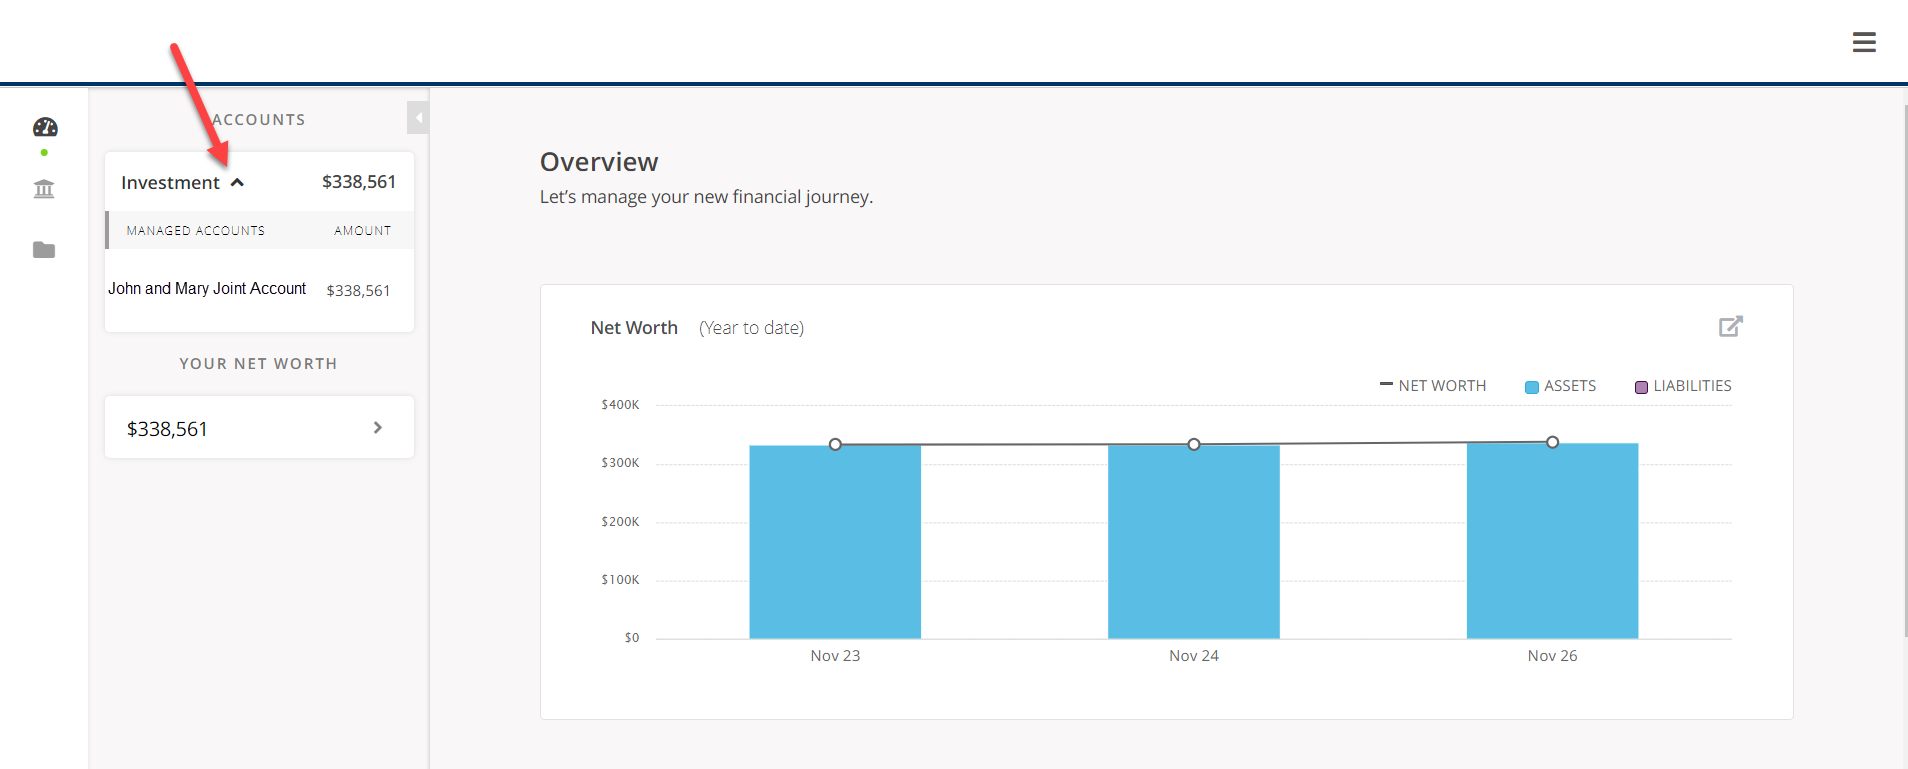
Click the arrow next to “Investment” to see the accounts that are linked to your Portal:
*Please note that the screenshots shown of the Client Portal are from a sample account created for demonstration purposes only. This sample account is being used for illustrative purposes only and does not represent actual client experiences or outcomes.